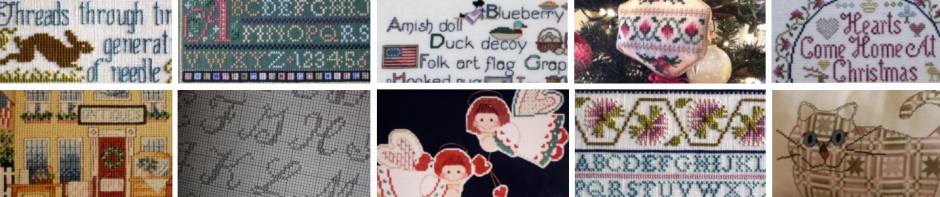


A worldwide epidemic has erupted among needleworkers. It makes me sad. It makes me mad. And I have decided to do something about it.
Gridding. With a water-soluble pen. With a pencil. On huge projects. On tiny projects.
Oh my. Where do I start? What makes me the craziest?
But before I tell you, I need to add a philosophical statement. Needlework is a leisure time hobby. As such, your enjoyment is more important than any advice I have to give. So take or leave it. I just want you to have the facts.
Here goes. I enjoy the time I spend on a couple of Facebook groups with a focus on needlework. I see hundreds of posts featuring incredibly huge complicated designs. If I were inclined to stitch one, I would absolutely want to grid. And after spending a year stitching it, I would want to be 100% sure that my gridlines were gone. So I would not use chemicals.
Chemicals. Chemicals are not good for textiles. Curators and other professionals go to great lengths to protect textiles from chemicals. And yet needleworkers worldwide have added the worst culprit to their go-to supplies. And boast of it. And start their projects with them.
Needleworkers grid with chemicals. They use water-soluble pens.
Here are some of the nightmares needleworkers experience after using these markers … and trusting that they will disappear. I know these things are true because a) in my many years of teaching, this subject always came up, although not with the frequency I see nowadays b) I see them posted week after week on the many groups I follow online and c) manufacturers address them in their FAQ’s.
Nightmare #1: the marks disappear only to reappear later. Like after you have spent a zillion dollars on framing. The thing about chemistry is that there are so many factors that can change an outcome. This is why chemists work in labs. Regardless, this is what happens: the ink gets imbedded in some fabrics. Some of the time.
You follow the manufacturer’s instructions. But maybe the fabric you use isn’t the same as what they used. Maybe you’re washing the marker out a year after creating your grid. Maybe they experimented with a week or a month. Maybe you rinsed until it looked like the ink was gone. Maybe they have some instrument that tells them the ink is gone. Whatever the cause, all the chemicals didn’t go away. Bottom line is that the ink will eventually migrate back to the top of the fabric. And there it is. Under glass. Sure you can take the frame apart and soak the fabric and re-mount and put the frame back together. Oh, and this only works if the ink is the original color.
Nightmare #2: your grid is no longer blue. It’s turned brown or grey. Well, it *should* stay blue. Sorry about that. If they change color, this is what Dritz has to say about it: “Marks should always remain the original color. If they change to a brown or grayish color, the marks have been chemically altered and may be permanent.”
Did you catch the “may be permanent” part?
Ahhhh… “chemically altered.” Like by exposure to heat … even sunlight or from a heat-producing task light. According to www.cdc.gov, “Cars parked in direct sunlight can reach internal temperatures up to 131° F – 172° F (55° C – 78° C) when outside temperatures are 80° F – 100° F (27° C – 38° C).” Have you ever left you needlework in the car on a hot day? I have. I didn’t mean to bake it. Neither did you.
But that’s not all … again, according to the Dritz FAQ’s: “Additionally, chemicals that are added to water in some municipalities may cause a reaction.” Like in a chemistry lab when you have a stable something and you add another chemical and now it’s something else. Like now the soluble ink is a permanent ink.
Nightmare #3: You follow instructions. The marks disappear. You iron the piece. Now if the ink does it migrating thing, you have successfully made the ink permanent.
Nightmare #4: You follow instructions. You even boiled the rinsing water to remove those municipal chemicals and let it cool. The marks haven’t disappeared. Why? Your own natural oils may be the thing that inhibits the solubility of the ink.
Nightmare #5: Somehow, your project gets wet. When you don’t mean for it to happen. There goes your grid.
The thing that makes me crazy and mad about this is all about longevity and heritage. I worry about what is going to happen to your precious needlework years from now. I want your work to be cherished by generations just as we value the work done by women and girls (and yes, some men) hundreds of years ago.
So what can you do? If you want to “grid” do so with needle and thread. A good choice is any color that you can see on the fabric you are using. You can use regular floss. One strand will do. No, you do not need any red plastic special thread made for guidelines! Spend your money on something else.
Here is a quick how-to: I am using a dark thread so you can follow along easily. If I were doing this for real, I would use tan or light green or just something I have handy.

Do a running stitch under two squares then over two squares. I knot this single strand because it will be removed. This is known as a “waste knot” since it will be wasted.

Using this under-two-over-two sequence, I can now easily grid in the opposite direction. I continue working under two and over two.

Sew rather than poke-and-pull. You can even take four stitches a time this way.

At the “100” mark, I switch colors. I would mark my chart to correspond with my grid.

At the end of each grid line, I take two stitches “over one” and pull the strand to the front. I leave about an inch and clip it.
By the way, I set a stopwatch and began to follow my own instructions. It took 20 minutes to create a stitched 50 x 50 grid. That may seem like a lot of time. People who grid routinely will tell you that the time it takes to grid is much less than the time you may spend ripping out and re-stitching. People who grid routinely with a chemical pen will say that they can do it more quickly with their chemical pen. If after reading this blog you still feel it’s safe to do it that way, it’s okay with me.
As you complete your needlework stitches, carefully clip the guide line and pull it out. Once you have stitched an area, the grid line has served it’s purpose.
Finally, you don’t “need” to grid unless you need to. I know, that sounds dumb. What I mean is, if you are getting along fine without it, don’t feel like you are doing something wrong. No matter how many people post about gridding.
Now go stitch.
When you’re not busy stitching, please “like” the Jean Farish Needleworks Facebook page, too! This is the best place to make comments about this blog as I get way too many spammers if I allow comments here.
Want to shop for JFN designs? Go to my Etsy shop!