


…. or …
To Wash or Not to Wash: That is the Question
I’m not a slob but I do want to enjoy my stitching time, which is often somewhere away from home (ballpark, doctor’s office, playground) and if I’m stitching for any length of time, food is involved! So when I am finished, I always, always wash and iron it.
This topic comes up almost weekly on Facebook groups. Back in the day when I had my Spirt of Cross Stitch TV show, we did a segment on how to wash and iron needlework. It was one of the most popular segments. And yet the topic seems controversial. So I decided it was time to write a post about it and put in my two cents worth.
Why do stitchers shy away from the washing and ironing stage of their project? The most common reasons given are
- I didn’t know I could.
- My work isn’t dirty.
- Why would I?
- The colors will bleed or the fabric will shrink and it will ruin all my hard work.
The truth is that you can and you should.
Now I try really hard to avoid the Should word. Should’s are hard and fast. I prefer the kinder, gentler, “You will get the best results by washing and ironing your project.” And “Once you learn some basics, washing and ironing your project isn’t so scary.”
But the bottom line is: you should wash and iron your needlework when you are finished stitching.
The bottom line is that no matter how careful you are, at the very least, you leave natural oils behind. Anything “invisible” left behind on the fabric will show up later. It may take 20 years, but it will show up.
And if you or someone around you smokes or if you have a pet, the reasons just got stronger.
But even if you stitch in a smoke-free, pet-free, food-free zone, needlework always looks better after it is washed and ironed, IMHO. The stitches will be plumper and the fabric will go back to being crisp and look brand new.
One more thing … when working on large pieces over any length of time, I sometimes wash and iron before I am done stitching. And sometimes it’s more than once. I find that I enjoy stitching more when my fabric is crisp.
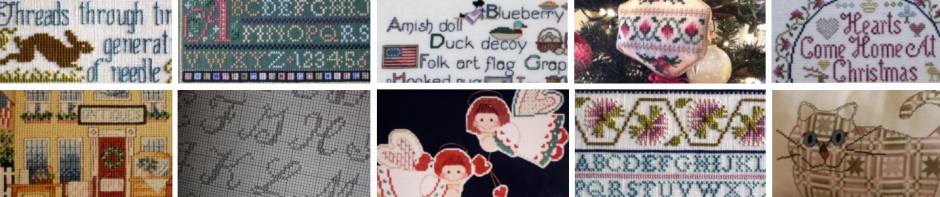
An important point before we get into this: I am speaking of a project stitched with cotton floss, perle coton (pearl cotton), linen thread, and flower thread. I am speaking of a project stitched with a brand that stands behind being colorfast. For any other fiber, you need to follow the manufacturer’s recommendations.
I am also speaking of projects stitched on Aida (which is made of cotton), linen (made of flax), and other evenweave fabrics made of cotton and cotton blends. Again, I am speaking of projects stitched on fabrics made by reputable, established companies.
And I am speaking of projects with NO markings done with any kind of pencil or pen, even those made to mark fabric and then are supposed to “disappear.” (See my November 16, 2014 post, “An Rx for a Worldwide Epidemic.”)
Washing
Use any detergent safe for cotton or linen. I particularly like “Orvus” which is readily available in needlework shops, quilt shops, and (surprisingly) from a veterinarian. I do not recommend products made for washing wool. If you are using powdered detergent, dissolve it in a small amount of very warm water. My go-to detergent has some granules that are larger and take longer to dissolve, so I strain it before I add it to the water.
I use a small plastic wash tub which I set inside my sink. This avoids the possibility of any grease residue in the actual sink getting into my wash water. It’s also convenient in case you get interrupted or someone else needs the sink.
Use tepid water. Not cold and certainly not hot. Just sort of barely warm.

Swish the cloth in the soapy water. You should not scrub. Just sort of gently move it around in the tub or sink.
If you know it is dirty, it’s okay to let is soak a little. When you are finished, if you use a white tub like mine, you will see that the water is not clear. You will see that you did indeed need to wash your project!

Rinse under cool running water. Rinse until the water is clear. Do not wring!

Lay the fabric flat on a terry towel … white or any toweling that has been washed so often you KNOW it won’t bleed.

Roll it up. You just want to get the drippy water out of it. You want the fabric to be very damp when you start to iron it.
Ironing
Both linen and cotton can tolerate a high heat.
Place your project face down on a stack of clean, dry terry towels. I use at least four layers.

Place a pressing cloth on the top … I use an old, thin, soft flour sacking towel I purchased where they sell kitchen towels.

Use the cotton or linen setting. Do not use the steam setting.

When I check on my progress, I can actually see the imprint of the stitches on the stack of toweling.

My stitches are plump, not flattened at all because of the softness of the towels. My linen is crisp and looks fabulous. The wonky lines will straighten out when I mount it.
As I iron, I stop and flip the toweling over if needed so I have a dry surface for ironing until I have ironed my project dry. If the fabric has any wrinkles left after all this, spray it with water and iron until it is wrinkle-free.
I have heard that some people use starch. Please, please do not do this! You should (there’s that word again) not need it. And if you do use starch, you’ve just added something that could affect your needlework over time which can be a bad thing.
No matter how dry I think my project is, I know there may still a little moisture left. I clip it to a hanger (the kind made for skirts or trousers) and let it hang for a few hours or overnight before framing or making it into something.
That’s it. It will take you less time to do all this than it took to read this post but the results will last forever.
Please visit my Facebook page and “like” the whole page. Page likes and shares are very much appreciated. Browse my Etsy store to find some of my needlework designs. I’ve been designing since 1981 and have chosen some of my favorites to feature in the shop.